
Follow the repair journey from intake to report review.
This guide explains how TensorVault customers use repair intake, status lookup, quote decisions, payment guidance, reports and warranty information.
Service flow at a glance
1. Repair intake
Enter product details, symptoms, photos, contact information and the delivery address for receiving the product after repair.
2. Document review
Keep the case number and check the document-review result from My Desk or verified guest lookup.
3. Head-office inbound
After document review passes, ship the product to the guided head-office address and wait for receipt and visual inspection.
4. Diagnostic-fee payment
If visual inspection passes, review the diagnostic-fee guidance, approve it and complete the deposit.
5. Specialist diagnosis and repair-fee quote
After diagnostic-fee payment is confirmed, the specialist team diagnoses the product and you approve or decline the repair-fee quote.
6. Repair and report
After repair-fee payment, repair and testing proceed and the customer repair report becomes available.
7. Head-office delivery and warranty
The repaired product ships to you via head office, and warranty information stays with the repair history.
Before you start
Preparing product and contact details helps the team review your case faster.
- Prepare manufacturer, model name and serial number for the GPU or product.
- Describe when the issue occurs, how it can be reproduced, display output and fan behavior when known.
- Attach product photos, symptom photos or screenshots when available.
- Prepare the domestic or international delivery address and reachable contact information for after repair completion.
- Prepare tax receipt or invoice billing information based on your domestic or international customer type.
- Guest intake and guest status lookup require an email address you can verify.
- Review the privacy and repair workflow consent items on the intake form.
- When bank transfer guidance appears, check the payment number, subtotal/VAT/total, bank account and due date together.
Create a repair intake
Start as a signed-in customer or guest from the Repair page.
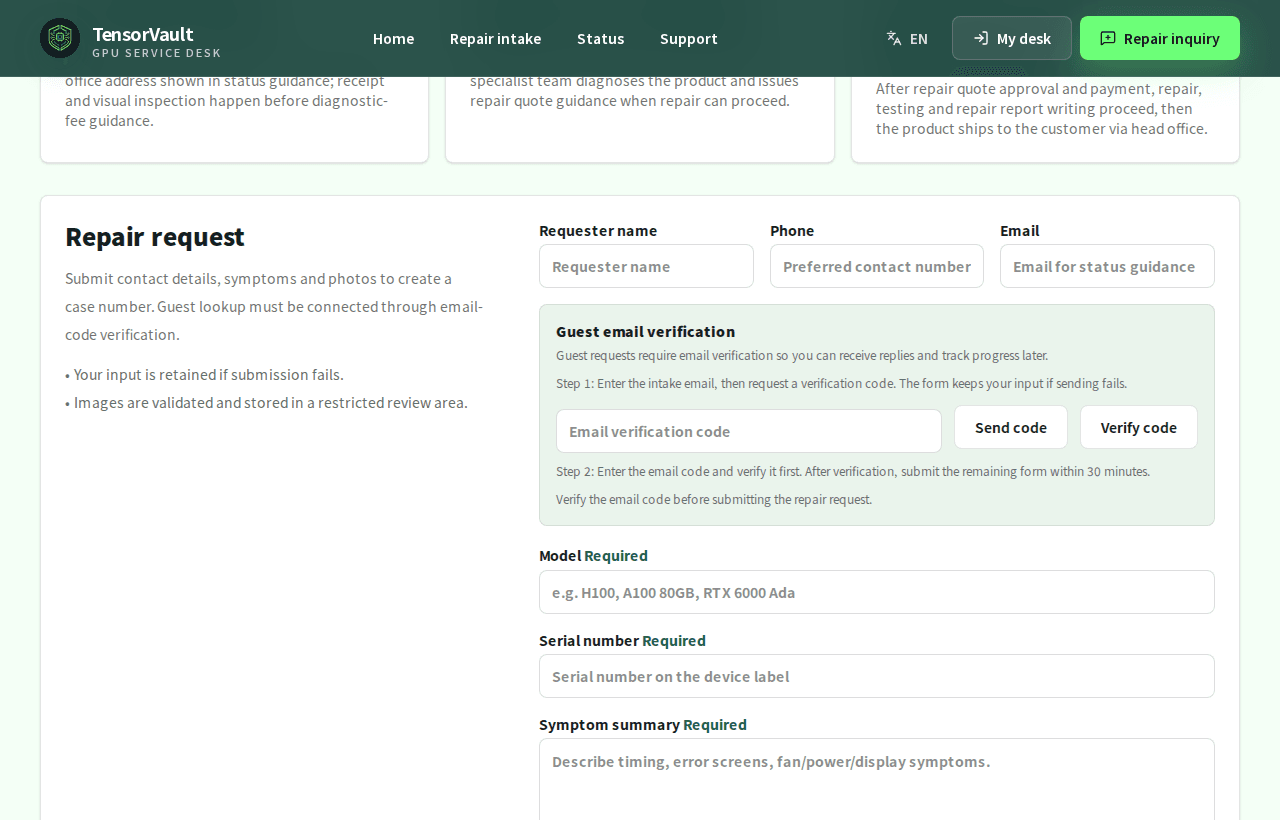
- Signed-in customers enter product details, symptoms, contact details and attachments from the repair intake page.
- Guests request an email code, verify the code first, then submit the remaining intake details within 30 minutes.
- Save the case number shown after submission for status lookup and support inquiries.
- The address entered during intake is the delivery address for receiving the product after repair. Choose domestic or international and type the address manually without address lookup.
- Domestic customers provide tax receipt or business tax invoice information, while international customers provide invoice billing information.
- The head-office inbound address for shipping the product is provided separately after document review passes. After TensorVault receives the product and completes visual inspection, diagnostic-fee guidance follows.
Guest repair status lookup
Guests can check progress with the intake email and repair case number.
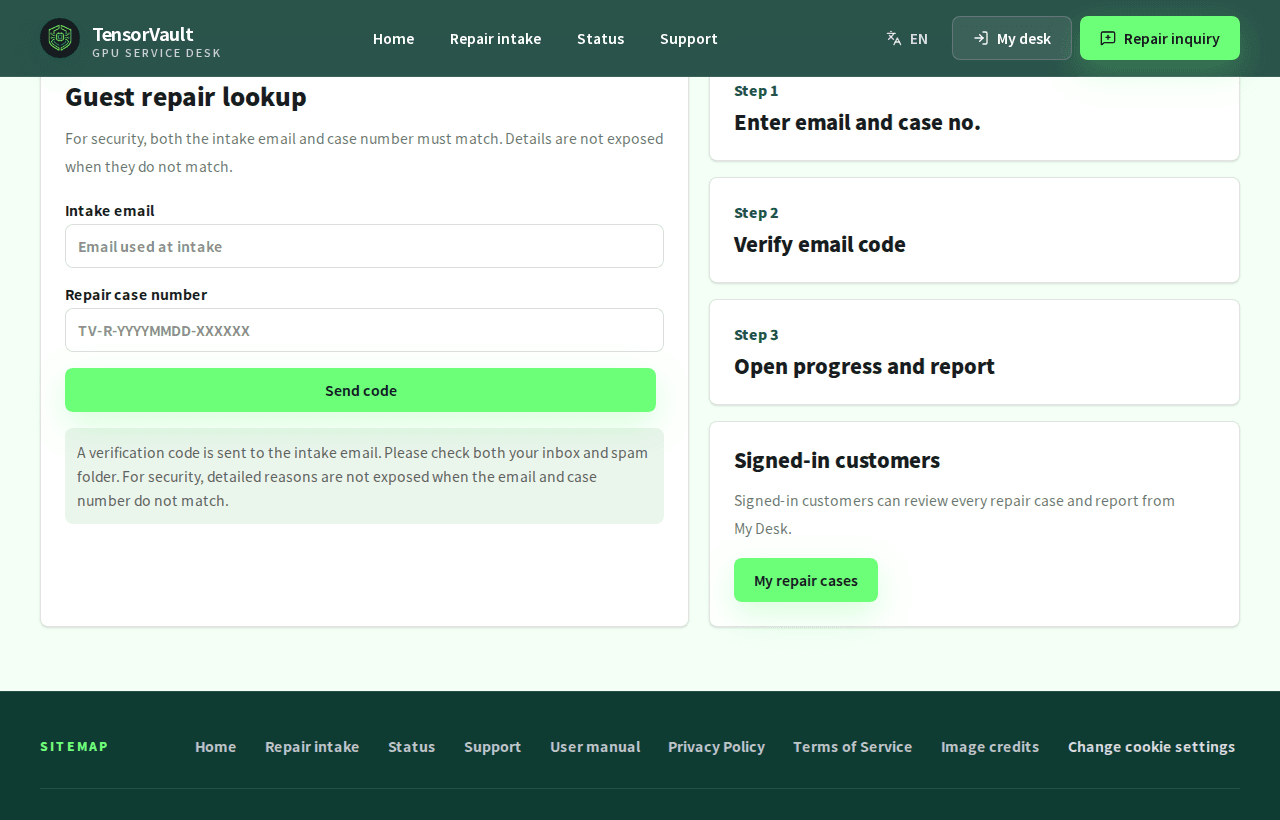
- Enter the intake email and repair case number on the status lookup page.
- Complete verification with the code sent by email.
- After verification, review current status, customer-facing messages, repair-unavailable reasons, quotes, payment guidance, shipment, warranty and available repair reports. The head-office inbound address appears only after document review passes while the case waits for inbound shipment.
- Even when signed in, a case verified through guest lookup is opened using guest lookup access.
Customer My Desk
Signed-in customers review their repair-related information by menu.
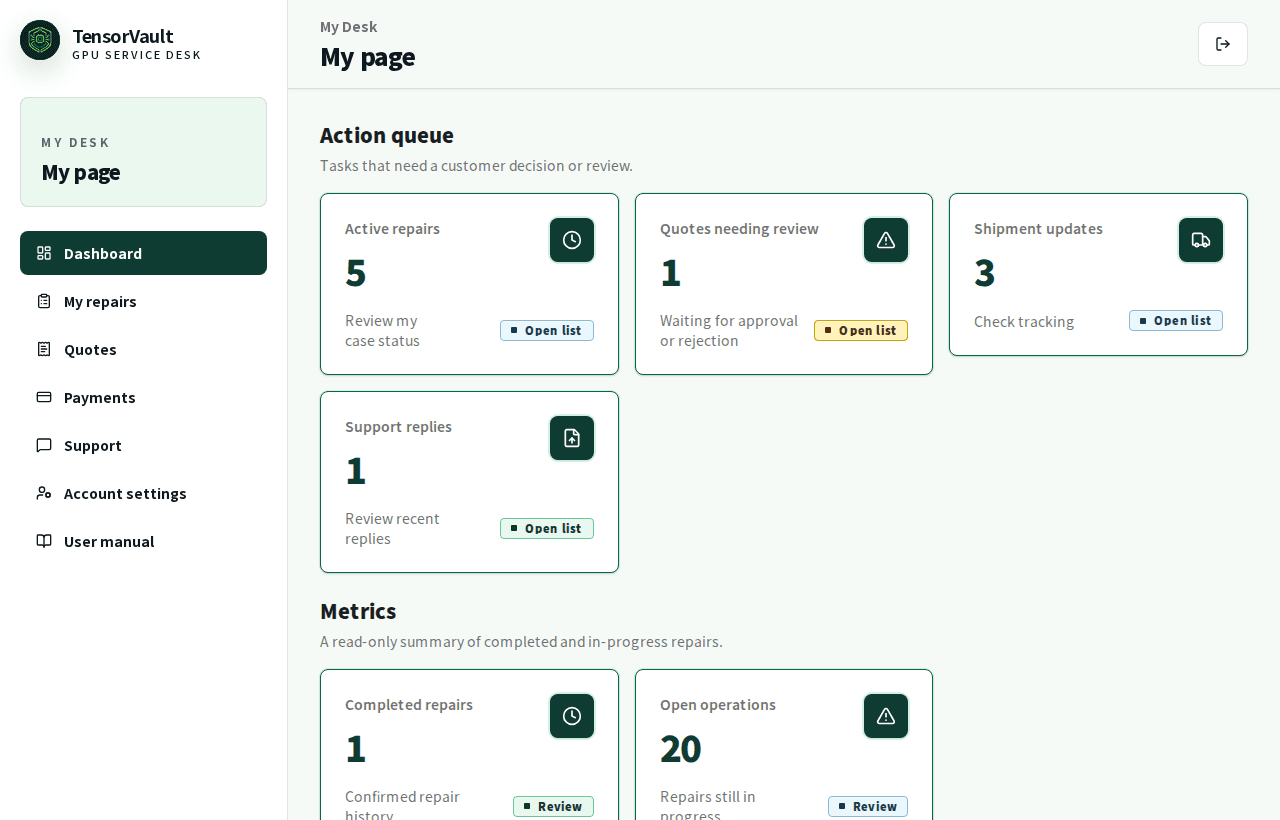
- Use the action queue on the dashboard to scan recent repairs, quotes, payments, support updates and next customer actions.
- Use the metrics dashboard to distinguish completed repairs from open operations.
- Use Account settings to manage name, email and password information.
- Account deletion opens a final review that shows access restrictions and linked provider removal based on the email and password confirmation you entered.
- Open My repairs to review status, history, public files, report PDFs, repair-unavailable reasons and shipment information.
- Use Quotes to approve or decline diagnostic or repair quotes.
- Use Payments to review payment requests, status and details.
- Use repair detail shipment guidance and Support to continue delivery and after-service checks, and review warranty details from repair details or the warranty check screen.
- Deleting uploaded files from a repair detail shows the file name, scan status and deletion impact first; failed deletion keeps the review available for retry.
- Use User manual to reopen the latest service guide.
Approve or decline quotes
Quotes may be issued for diagnostic fees or repair fees.
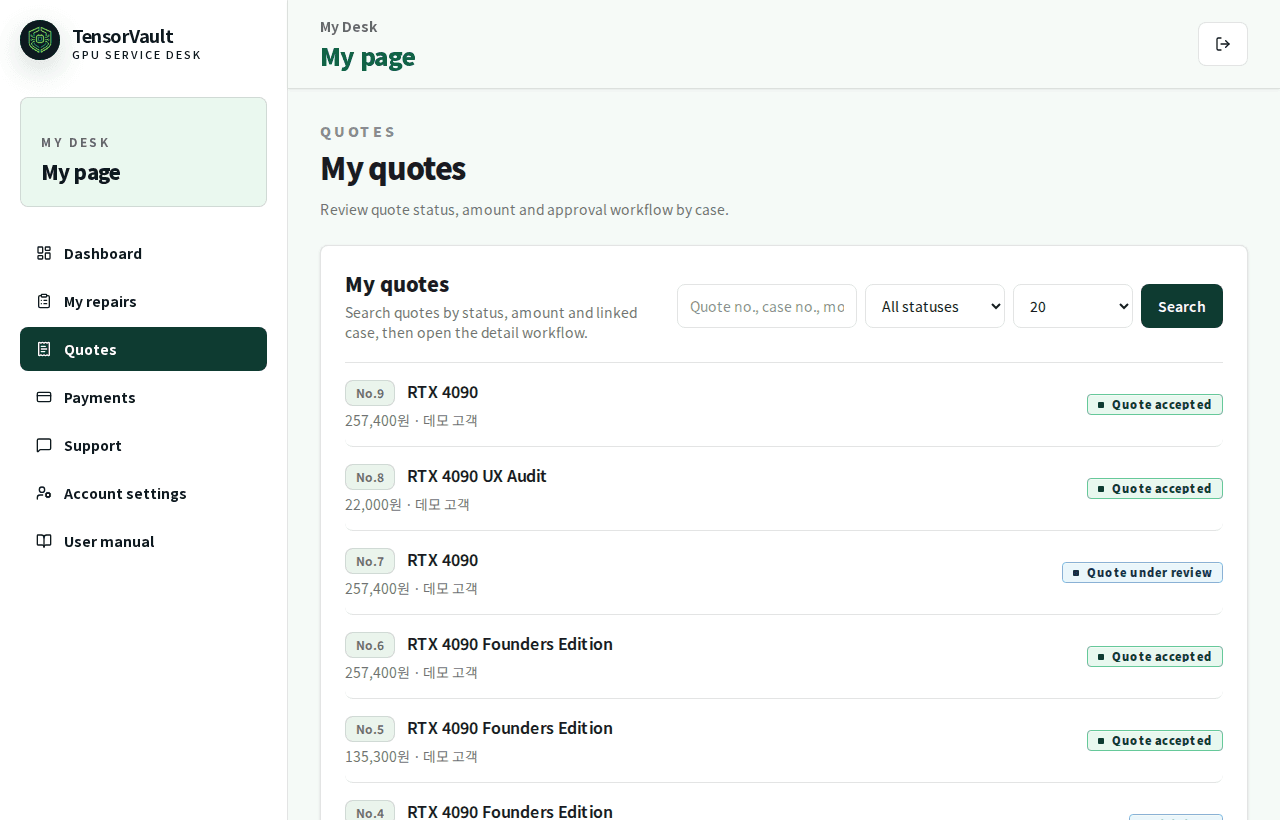
- A quote that shows approve and decline buttons needs your decision.
- Approving a quote shows bank transfer guidance and asks you to review the depositor name, defaulted from your account name, before the case moves toward repair or payment guidance.
- Declining a quote stops repair progress and moves the case to product delivery.
- Diagnostic-fee guidance is issued after head-office receipt and visual inspection. The diagnostic fee includes standard return shipping to the customer. Once the deposit is confirmed, the case moves to specialist team diagnosis.
- Approve or decline the repair-fee quote after specialist team diagnosis. Repair starts only after repair-fee payment is confirmed.
- Review subtotal, VAT, VAT-included total, product model, work items and valid-until date before deciding.
- When a repair-fee invoice has been issued for an international customer, the quote detail can show a PDF download link.
- Billing requests that operations voided or cancelled, and cancelled invoices, are not shown on customer screens.
Payment and bank transfer guidance
Approved bank transfer quotes show payment guidance on the payment detail screen.
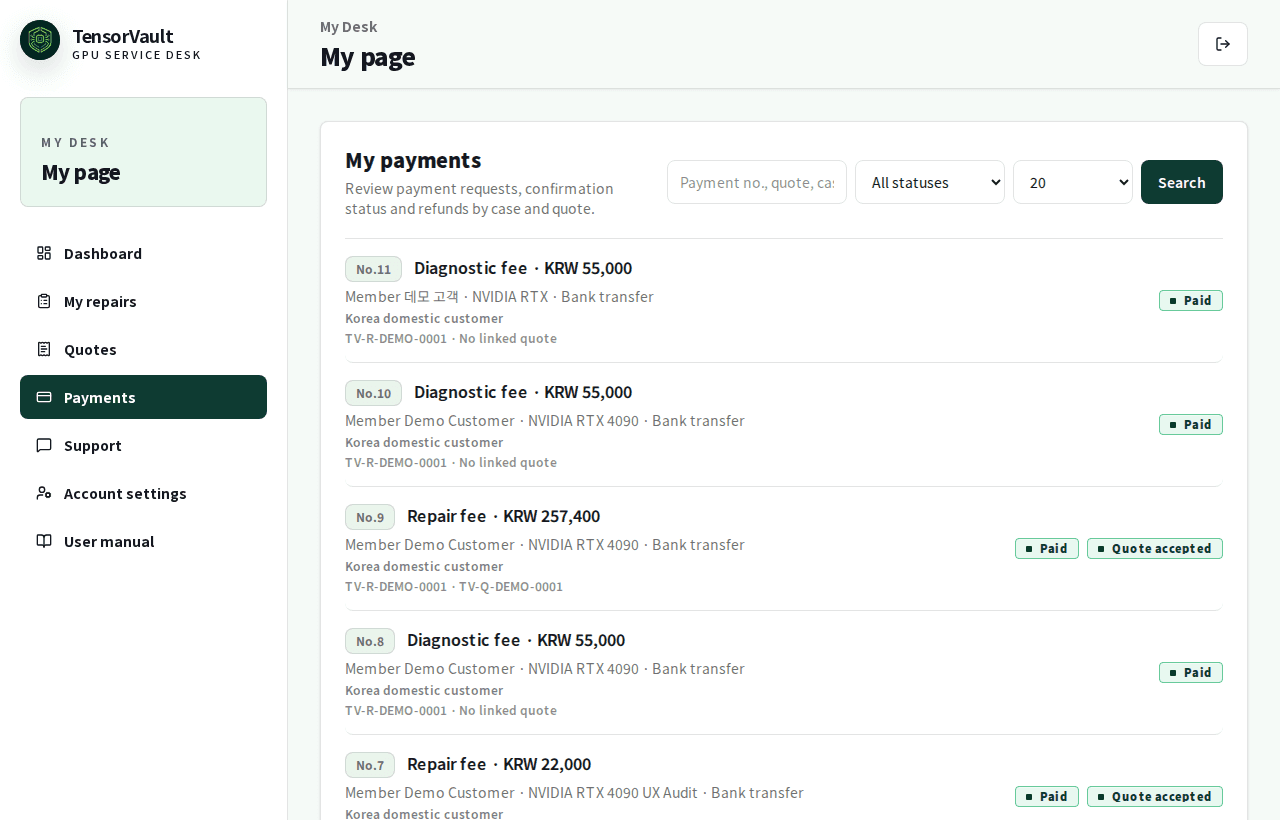
- Check the payment number, case number and quote number.
- Confirm whether the payment is for diagnostic fee or repair fee.
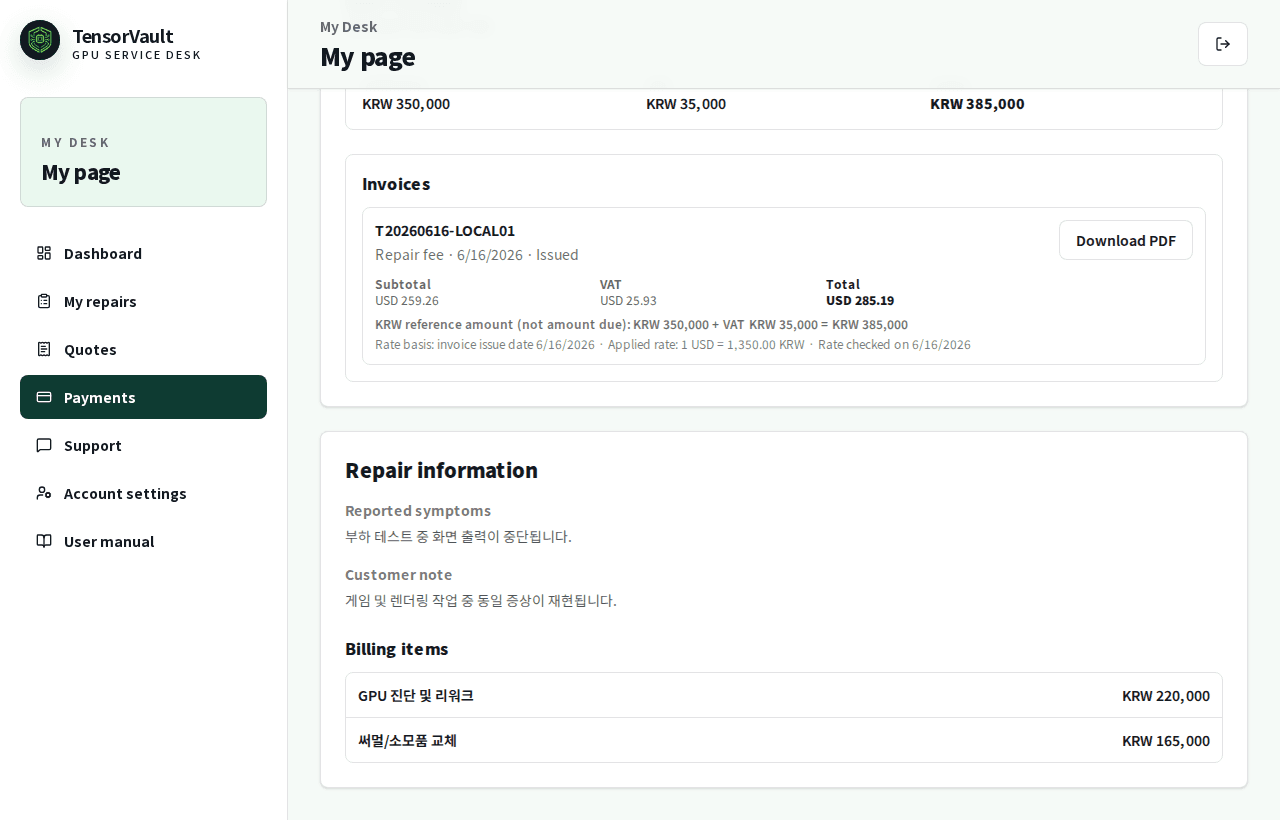
- Payment details with bank transfer guidance show subtotal, VAT, VAT-included total, bank account, due date, payment status and the depositor name you entered when approving the quote.
- Domestic customer amounts are displayed naturally in KRW, while international customer amounts show explicit currency codes such as KRW or USD.
- International payment guidance may show a foreign-currency bank account and a USD reference amount fixed when the payment is issued.
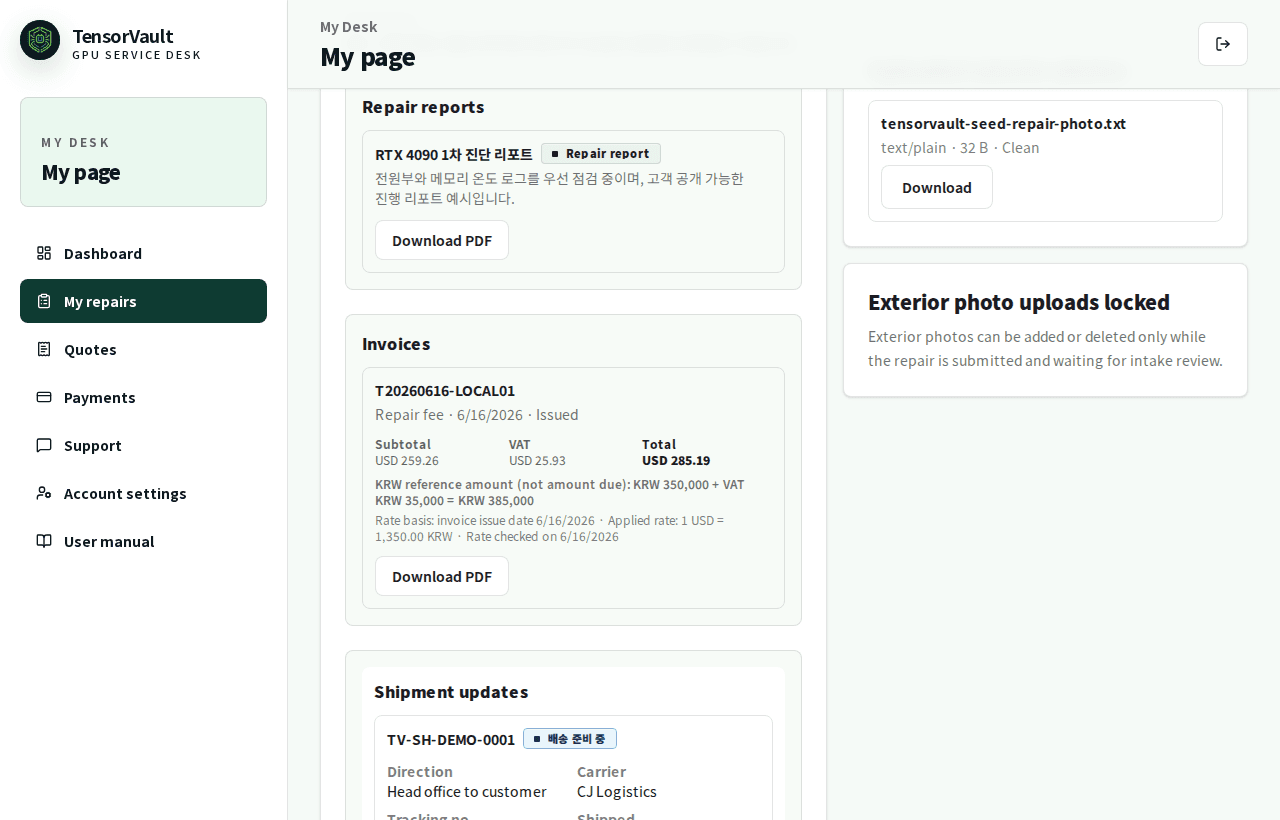
- For international customers, the invoice PDF is a payment invoice, not a customs commercial invoice. It shows Bill to, Equipment, Items, Payment details, Totals, invoice number and case references.
- Issued invoices can be downloaded as PDFs from payment details or linked quote details. Cancelled or hidden invoices are not listed for customers.
- After TensorVault confirms the diagnostic-fee deposit, the case moves to the specialist team. After repair-fee deposit is confirmed, the repair team proceeds with repair and reporting.
- If a refund is needed, domestic refunds apply the transfer-fee and minimum-refund rule, while international refunds apply the international refund remittance fee; the payment detail shows the calculation basis.
Repair reports and warranty
An initial diagnosis report may be published during diagnosis. The final repair report is published after repair and testing, then the product proceeds to center inspection and customer delivery.
- Signed-in customers open available repair reports from the repair detail screen in My repairs.
- Guests open available reports from verified status lookup.
- Repair report PDFs may include repair summaries, recommended guidance, staff notes, an optional checksheet page, user-uploaded images and staff-uploaded images on separate pages.
- Images are grouped by user-uploaded images and staff-uploaded images, and PDF text is provided as selectable text for copying or translation.
- Warranty details are confirmed only after the final repair report is ready, and appear with repair history when coverage and period are registered.
Review the invoice PDF document shape
The invoice PDF is a payment document. It should be described as payment guidance and billing confirmation, not as a customs commercial invoice.
- The invoice PDF shows Bill to, Equipment, Items, Payment details, Totals, invoice number and case references.
- Issued invoices can be downloaded from payment details or linked quote details.
- Invoices voided, cancelled or hidden by operations are not listed for customers.
- International customers should compare the foreign-currency bank account and fixed USD reference amount with the PDF.
Contact support
Use Support or My Desk support for repair, quote, payment, shipment and warranty questions.
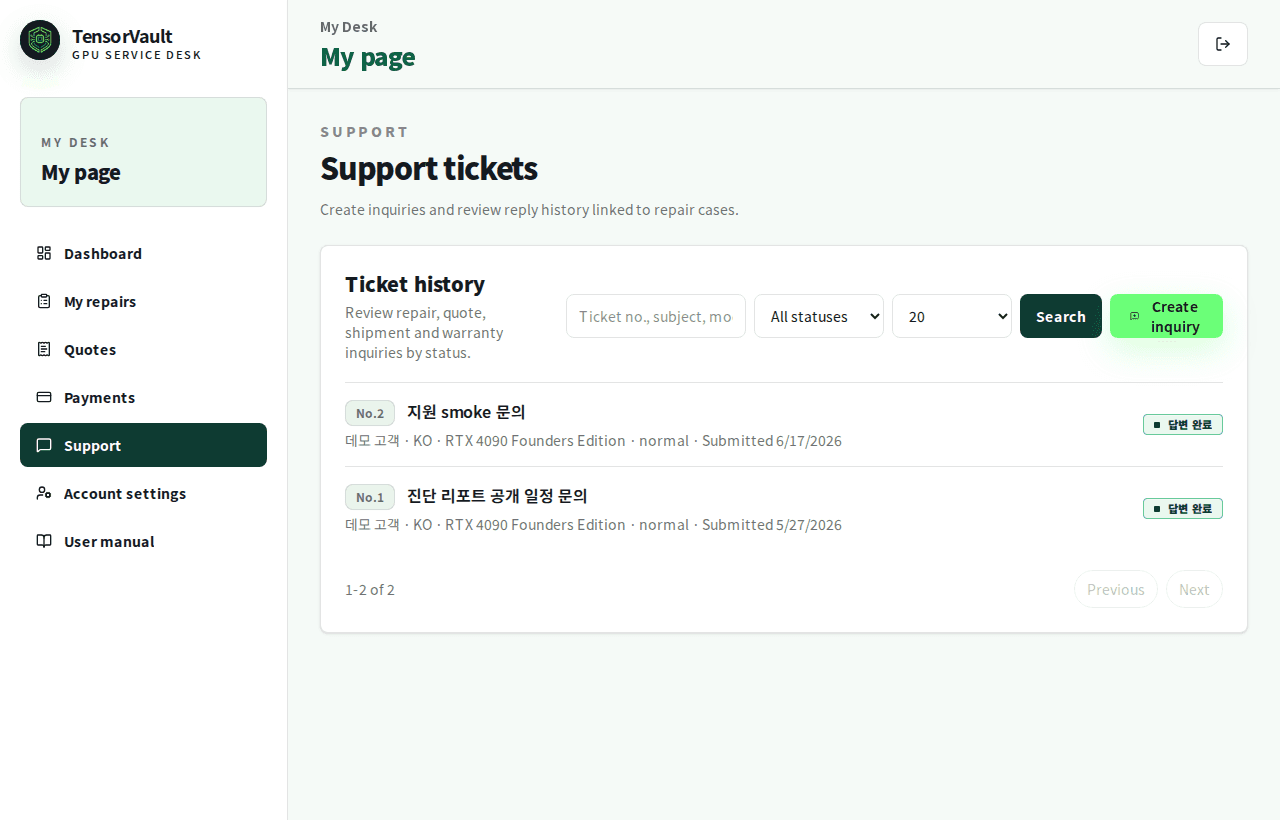
- Signed-in support inquiries are managed with your repair history.
- Guests can create inquiries after email verification.
- Selecting or entering the related case number helps the team check that repair history faster.
- When closing a draft inquiry, the screen warns that unsent content can be discarded so you do not lose input accidentally.
Frequently asked questions
What is the case number used for?
It is used for guest status lookup, support inquiries, quote checks and payment checks.
I lost the case number.
Check the submission screen, notification email or previous inquiry history first. If you cannot find it, prepare the intake email and product information before contacting support.
I did not receive the verification email.
Check the spam folder and the email address you entered, then request another code. Requesting a new code invalidates the previous verification, so verify with the newest code. If the email was entered incorrectly, contact support to confirm intake information.
When should I ship the product?
After document review passes, the head-office inbound address appears while the case waits for inbound shipment. The address entered during intake is the delivery address for receiving the product later.
Does repair start immediately after quote approval?
Diagnostic-fee approval and deposit move the case to specialist diagnosis. Repair-fee approval and deposit move it to repair and reporting. Each step starts after payment confirmation when required.
The quote validity date has passed.
If you cannot decide from the quote screen or need confirmation, contact support to ask whether review or requote is available.
File upload is not working.
Check file type and size, then try again. Attachments are scanned before they are stored, and suspected unsafe files or temporarily unavailable scan results are not saved. If it keeps failing, submit the symptom details first and ask support how to send additional materials.
I cannot see the report.
The report may not be published yet, or the access may not be verified. Check again from repair detail or verified guest lookup.
I cannot see an invoice.
The invoice may not have been issued yet, or operations may have cancelled the previous invoice before reissue. Cancelled or hidden invoices are not shown on customer screens.
I made a deposit but the status did not change.
Deposit confirmation is reflected after TensorVault review. Provide the payment number and total when asking support.